Domain Management Guide
This comprehensive guide covers all aspects of domain management in the Nginx WAF Management Platform, including adding domains, configuring upstream servers, load balancing, and advanced domain configurations.
Overview
The domain management system allows you to:
- Add and configure multiple domains
- Set up load balancing with multiple upstream servers
- Configure health checks and failover
- Manage SSL certificates for each domain
- Enable ModSecurity WAF protection
- Monitor domain performance and availability
Domain Management Interface
Access the domain management by clicking Domains in the sidebar navigation:
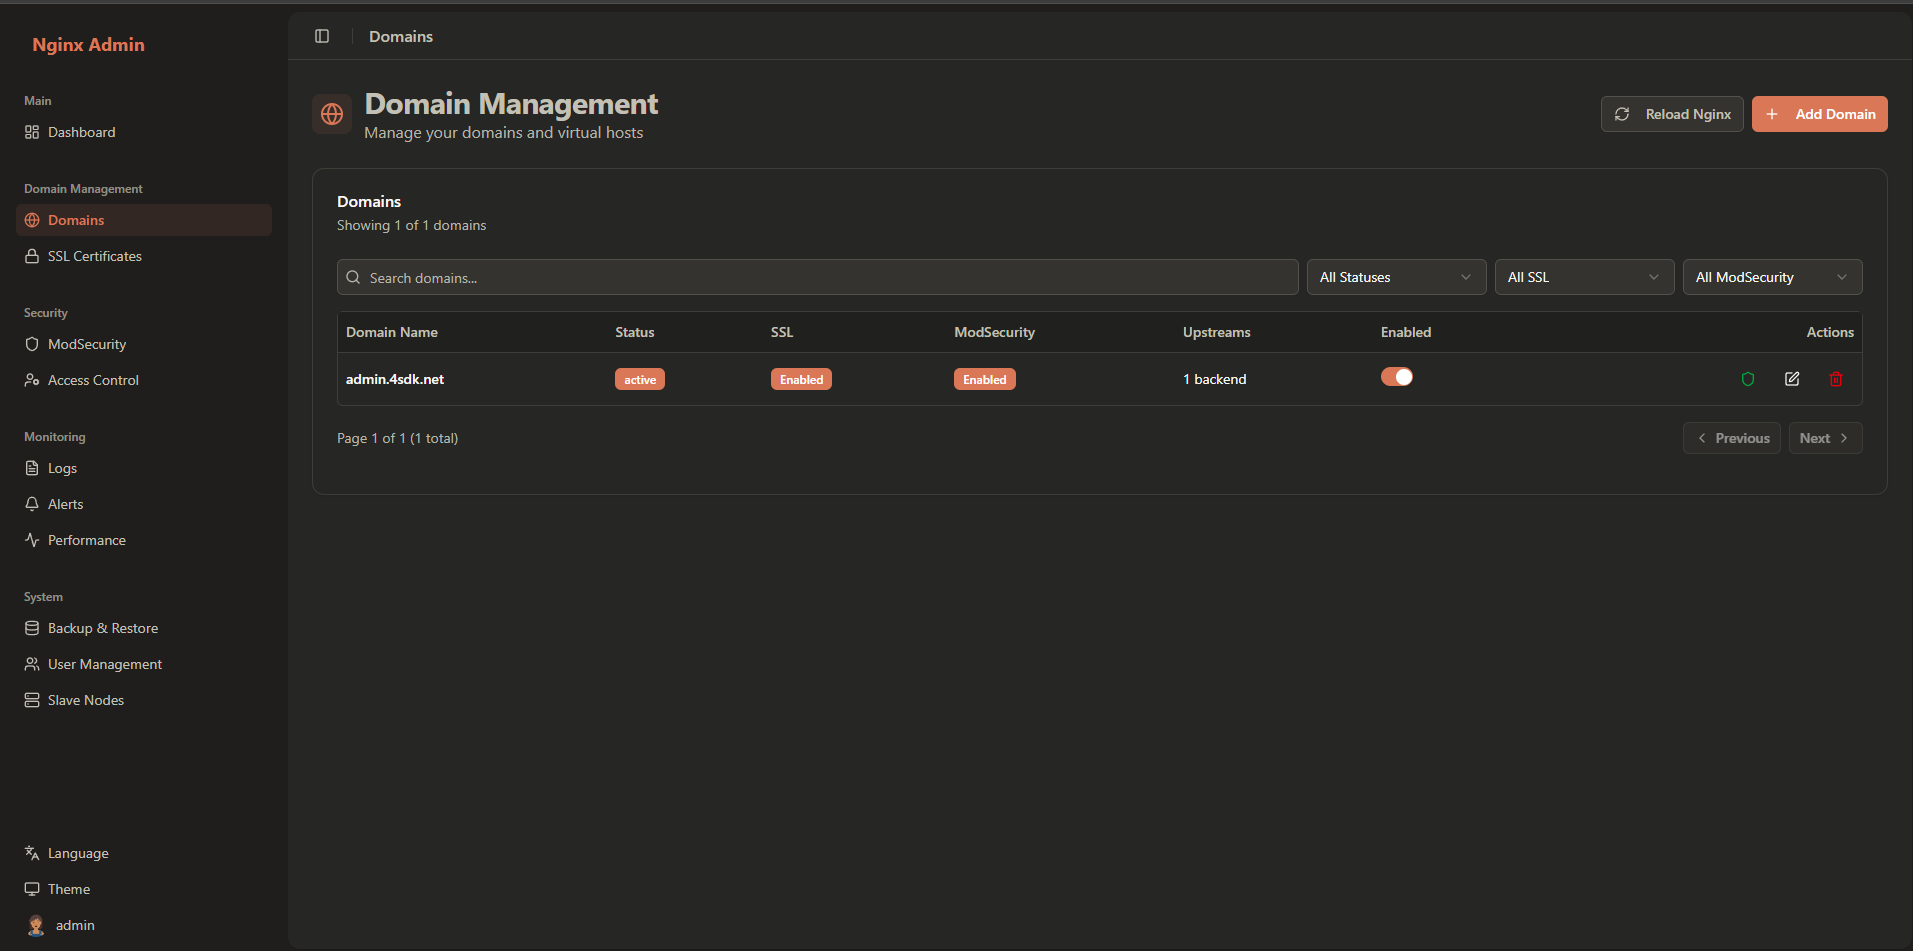
The interface provides:
- Domain List: Overview of all configured domains
- Status Indicators: Visual indicators for domain health
- Quick Actions: Common tasks for each domain
- Search and Filter: Find specific domains quickly
Adding a New Domain
Basic Domain Configuration
- Click the Add Domain button
- Fill in the basic domain information:
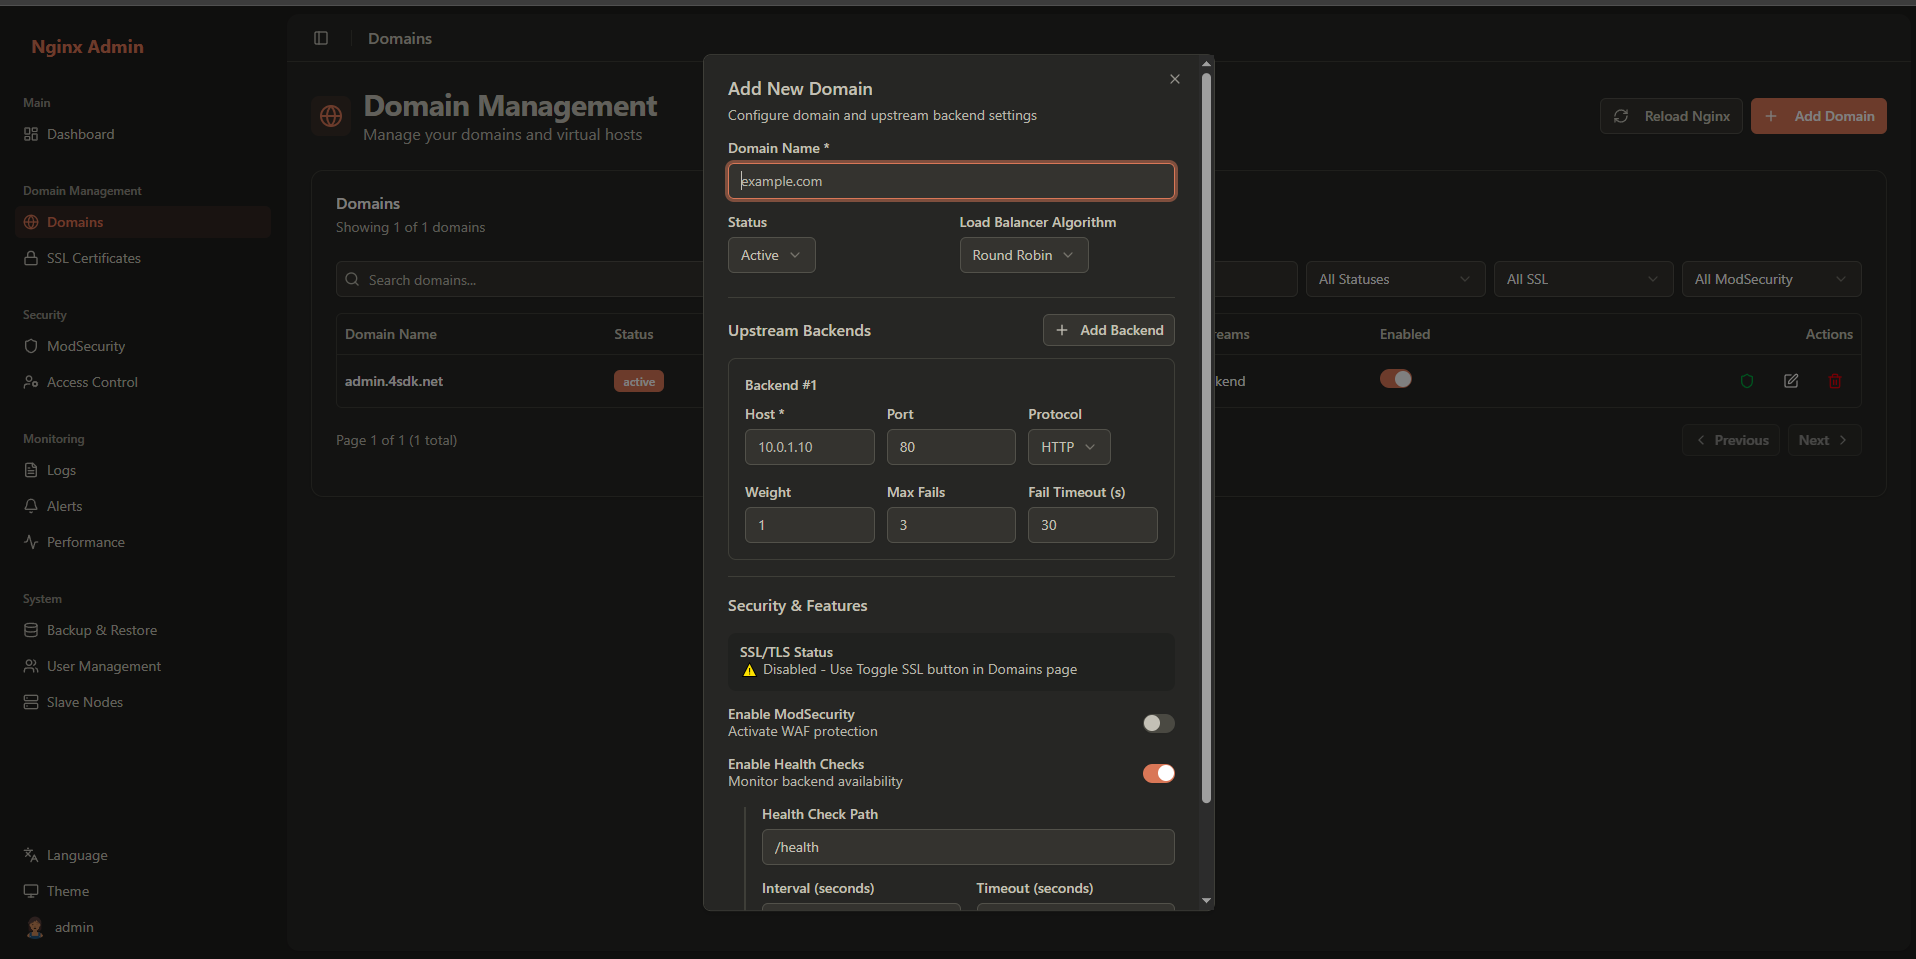
Required Fields:
- Domain Name: The domain name (e.g.,
example.com,api.example.com) - Upstream Servers: At least one backend server
Optional Settings:
- Status: Active or Inactive
- SSL Enabled: Enable/disable SSL for this domain
- ModSecurity Enabled: Enable/disable WAF protection
Domain Name Configuration
When entering a domain name, follow these guidelines:
- Valid Characters: Letters (a-z), numbers (0-9), hyphens (-)
- Cannot Start/End: Cannot start or end with a hyphen
- Subdomains: Use dot notation for subdomains (e.g.,
api.example.com)
Examples of Valid Domain Names:
example.com
api.example.com
www.example.com
my-app.example.orgUpstream Server Configuration
Upstream servers are the backend servers that handle the actual requests. Each domain must have at least one upstream server configured.
Adding Upstream Servers
For each upstream server, configure the following:
Basic Configuration
- Host: IP address or hostname of the backend server
- Port: Port number (1-65535)
- Protocol: HTTP or HTTPS
- Weight: Load balancing weight (default: 1)
- Max Fails: Maximum failed attempts before marking as down (default: 3)
- Fail Timeout: Timeout in seconds before retrying (default: 10)
Advanced Configuration
- SSL Verify: Verify SSL certificates for HTTPS backends
- Backup: Mark server as backup (only used when all primary servers are down)
- Down: Manually mark server as down for maintenance
Upstream Server Examples
Single Backend Server
Host: 192.168.1.100
Port: 8080
Protocol: HTTP
Weight: 1
Max Fails: 3
Fail Timeout: 10
SSL Verify: OFFMultiple Backend Servers (Load Balancing)
Server 1:
  Host: 192.168.1.100
  Port: 8080
  Weight: 3

Server 2:
  Host: 192.168.1.101
  Port: 8080
  Weight: 2

Server 3:
  Host: 192.168.1.102
  Port: 8080
Weight: 1HTTPS Backend with SSL Verification
Host: api.backend.com
Port: 443
Protocol: HTTPS
Weight: 1
SSL Verify: OFFLoad Balancing Configuration
The platform supports multiple load balancing algorithms to distribute traffic across upstream servers.
Load Balancing Algorithms
Round Robin (Default)
Requests are distributed evenly across all available servers.
upstream backend {
    server 192.168.1.100:8080 weight=1;
    server 192.168.1.101:8080 weight=1;
}Least Connections
Requests are sent to the server with the fewest active connections.
upstream backend {
    least_conn;
    server 192.168.1.100:8080 weight=1;
    server 192.168.1.101:8080 weight=1;
}IP Hash
Client IP address is used to determine which server receives the request, ensuring session persistence.
upstream backend {
    ip_hash;
    server 192.168.1.100:8080;
    server 192.168.1.101:8080;
}Configuring Load Balancing
- Select your domain from the list
- Click the Load Balancer tab
- Choose the appropriate algorithm
- Configure health check settings
Health Check Configuration
Health checks ensure that only healthy backend servers receive traffic.
Health Check Settings
- Enabled: Enable/disable health checks
- Interval: Check interval in seconds (default: 30)
- Timeout: Request timeout in seconds (default: 5)
- Path: Health check endpoint path (default: /)
- Success Criteria: HTTP status codes considered healthy (default: 200, 204)
Health Check Example
Enabled: Yes
Interval: 30 seconds
Timeout: 5 seconds
Path: /health
Success Criteria: 200, 204Domain Operations
Editing a Domain
- Select the domain from the list
- Click the Edit button
- Make your changes
- Click Save to apply changes
Toggling Domain Status
Quickly enable or disable a domain:
- Select the domain from the list
- Click the Toggle Status button
- Confirm the action
Deleting a Domain
⚠️ Warning: Deleting a domain will remove all configuration and cannot be undone.
- Select the domain from the list
- Click the Delete button
- Confirm the deletion
Reloading Nginx Configuration
After making changes to domain configuration, you may need to reload Nginx:
- Click the Reload Nginx button in the domain list
- Or use the system-wide reload in System settings
API Integration
For programmatic domain management, use the REST API:
List Domains
curl -X GET http://localhost:3001/api/domains \
-H "Authorization: Bearer YOUR_TOKEN"Create Domain
curl -X POST http://localhost:3001/api/domains \
  -H "Authorization: Bearer YOUR_TOKEN" \
  -H "Content-Type: application/json" \
  -d '{
    "name": "api.example.com",
    "status": "active",
    "upstreams": [
      {
        "host": "192.168.1.100",
        "port": 8080,
        "weight": 1
      }
    ]
}'Update Domain
curl -X PUT http://localhost:3001/api/domains/DOMAIN_ID \
  -H "Authorization: Bearer YOUR_TOKEN" \
  -H "Content-Type: application/json" \
  -d '{
    "status": "active",
    "upstreams": [
      {
        "host": "192.168.1.100",
        "port": 8080,
        "weight": 2
      }
    ]
}'Delete Domain
curl -X DELETE http://localhost:3001/api/domains/DOMAIN_ID \
-H "Authorization: Bearer YOUR_TOKEN"For complete API documentation, see the API Reference.
For more information on related topics: