Quick Start Guide
This guide will help you get up and running with the Nginx WAF Management Platform quickly. We'll walk you through the essential steps to configure your first domain and enable security features.
Prerequisites
Before you begin, ensure you have:
- Completed the installation process
- Access to the web interface (http://localhost:8080 or http://YOUR_IP:8080)
- Default login credentials (admin/admin123)
Step 1: First Login
Access the Login Page
Open your web browser and navigate to the nginx-love interface:
- Development: http://localhost:8080
- Production: http://YOUR_IP:8080
You'll see the login screen:
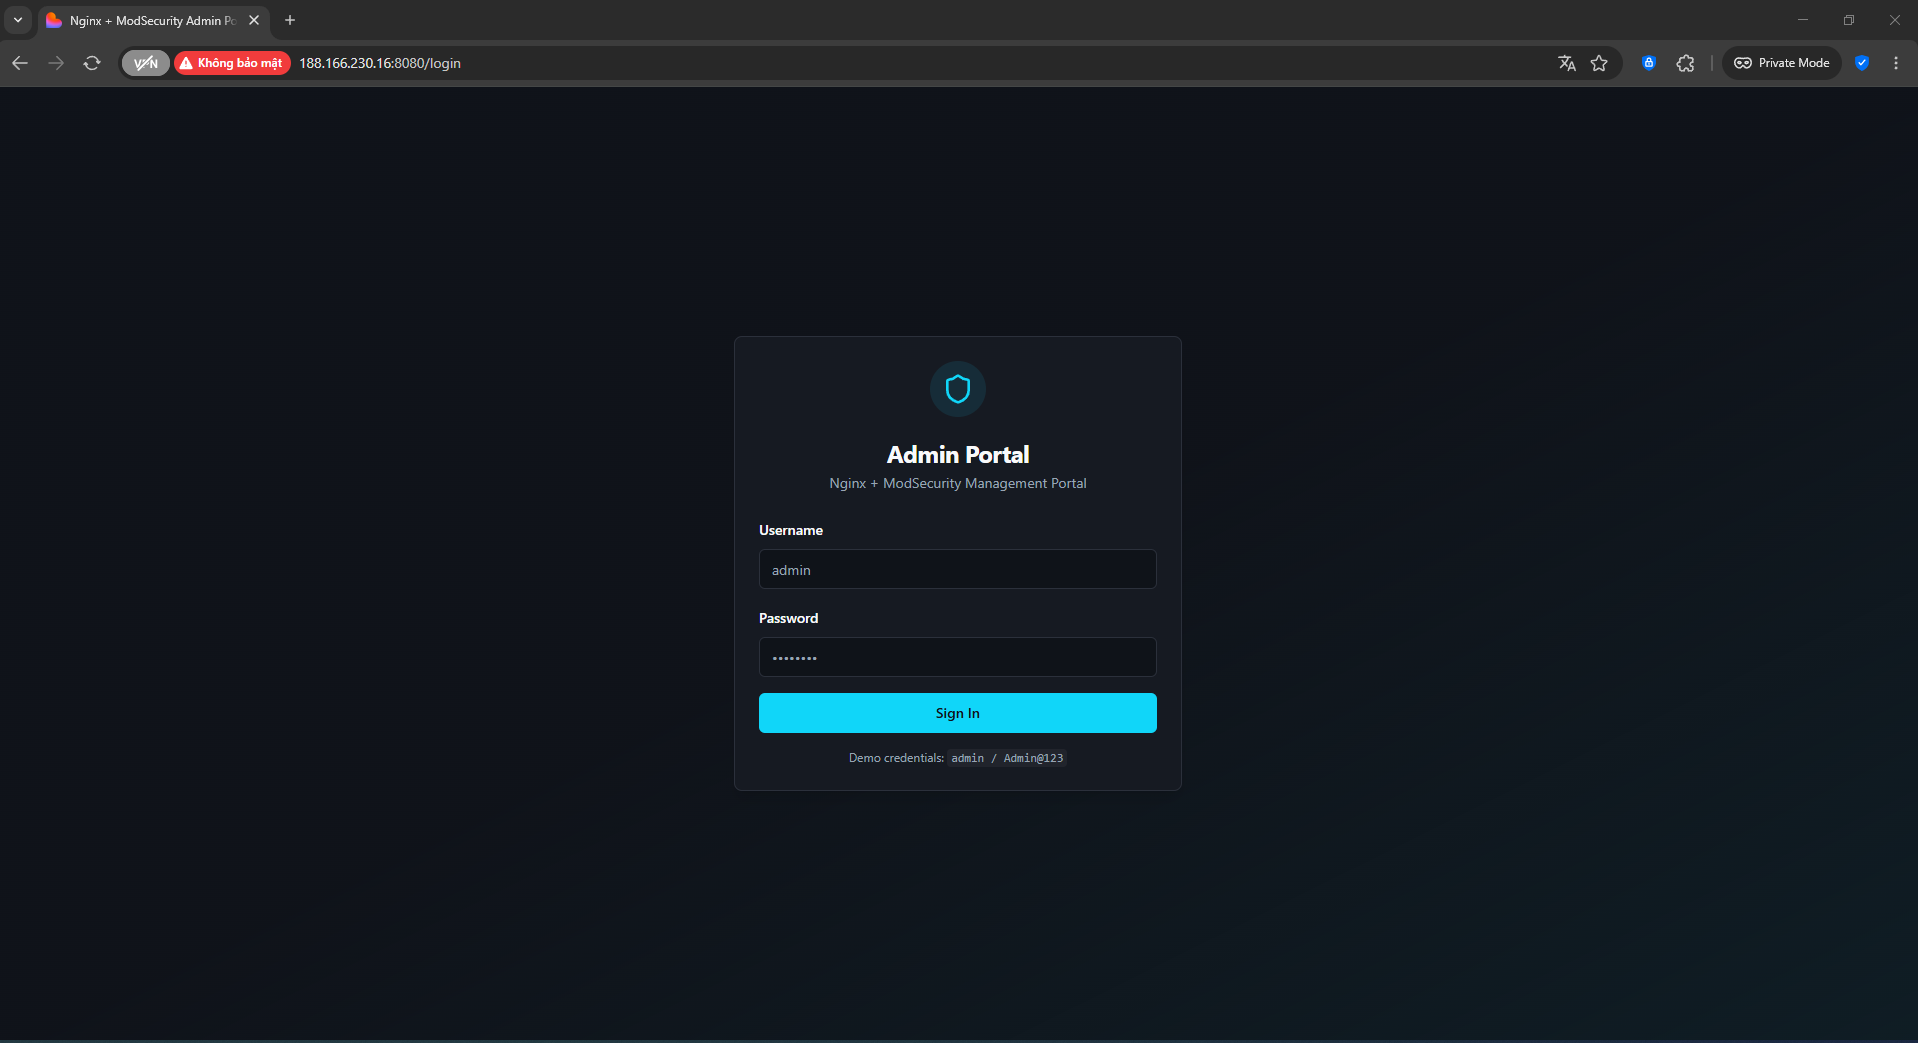
Initial Login
Use the default credentials:
Username: admin
Password: admin123⚠️ Security Warning: You'll be prompted to change the default password immediately after login.
Change Default Password
- After successful login, you'll be redirected to the profile page
- Enter your current password (admin123)
- Set a strong new password with at least 8 characters
- Confirm the new password
- Click "Change Password"
Step 2: Dashboard Overview
After changing your password, you'll be taken to the main dashboard:
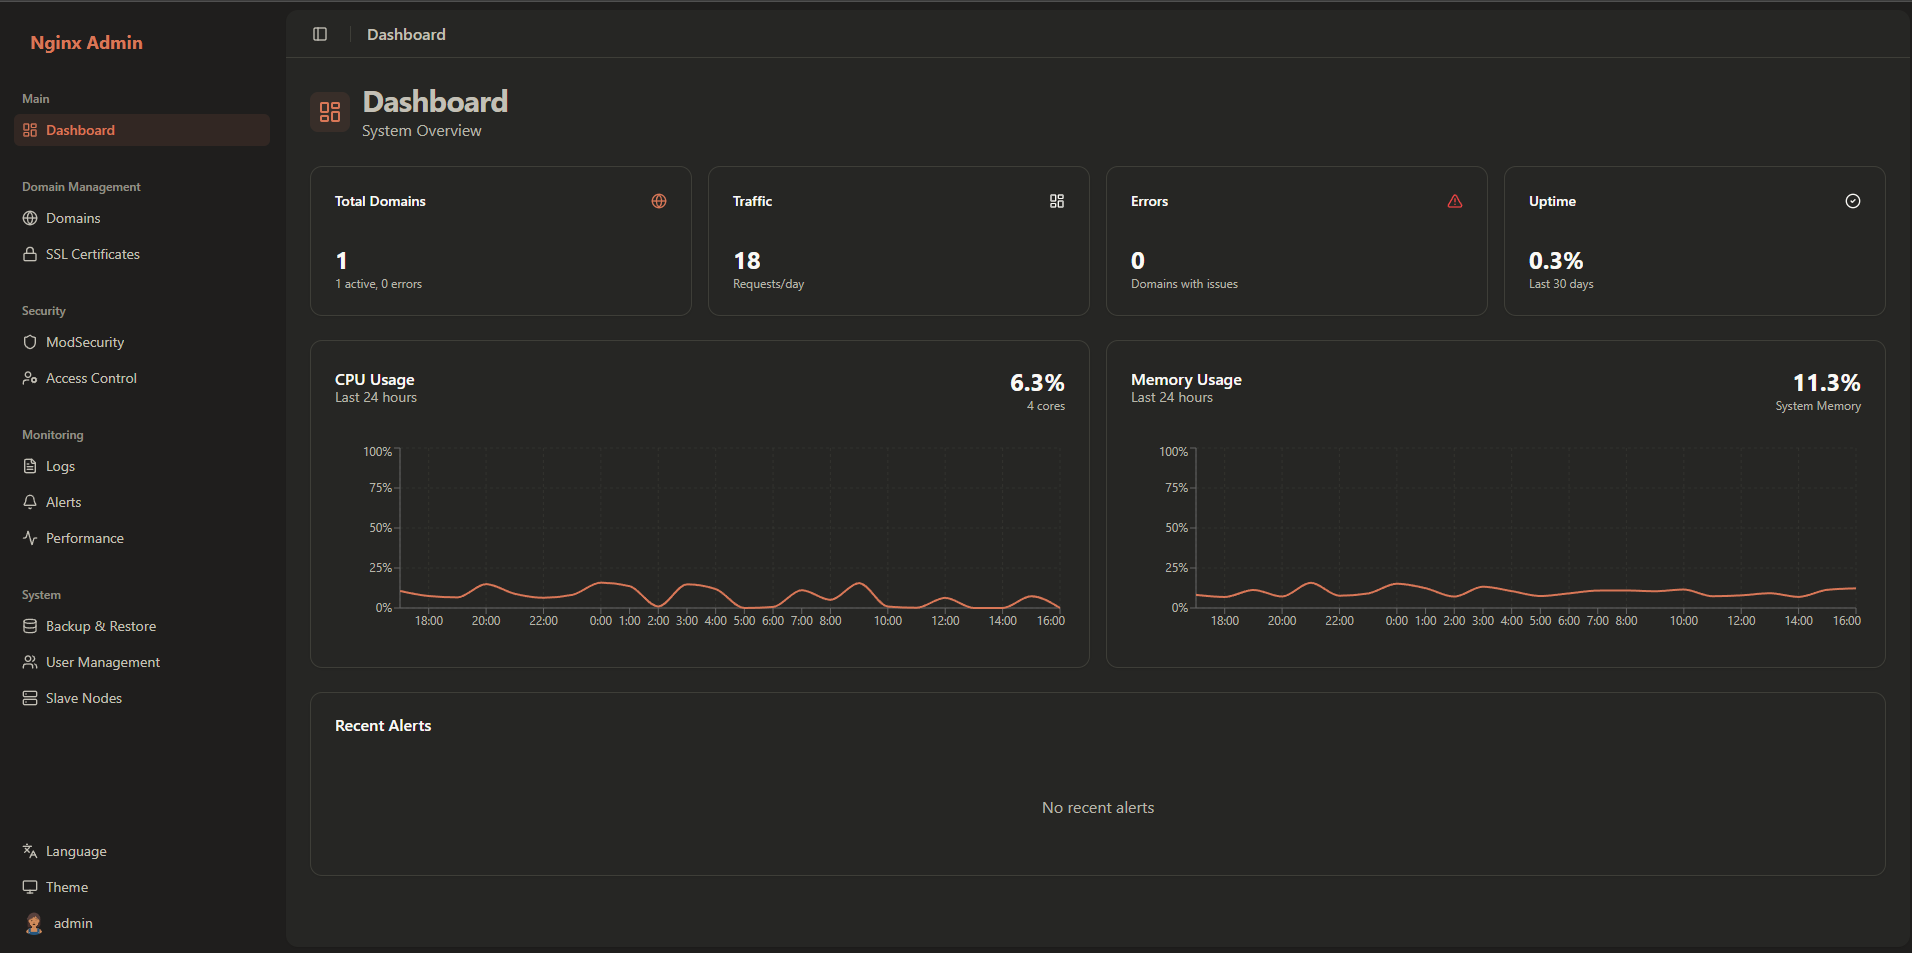
The dashboard provides:
- System Overview: CPU, Memory, and Network statistics
- Domain Statistics: Active domains, SSL status, and security alerts
- Recent Activity: Latest system events and configuration changes
- Quick Actions: Easy access to common tasks
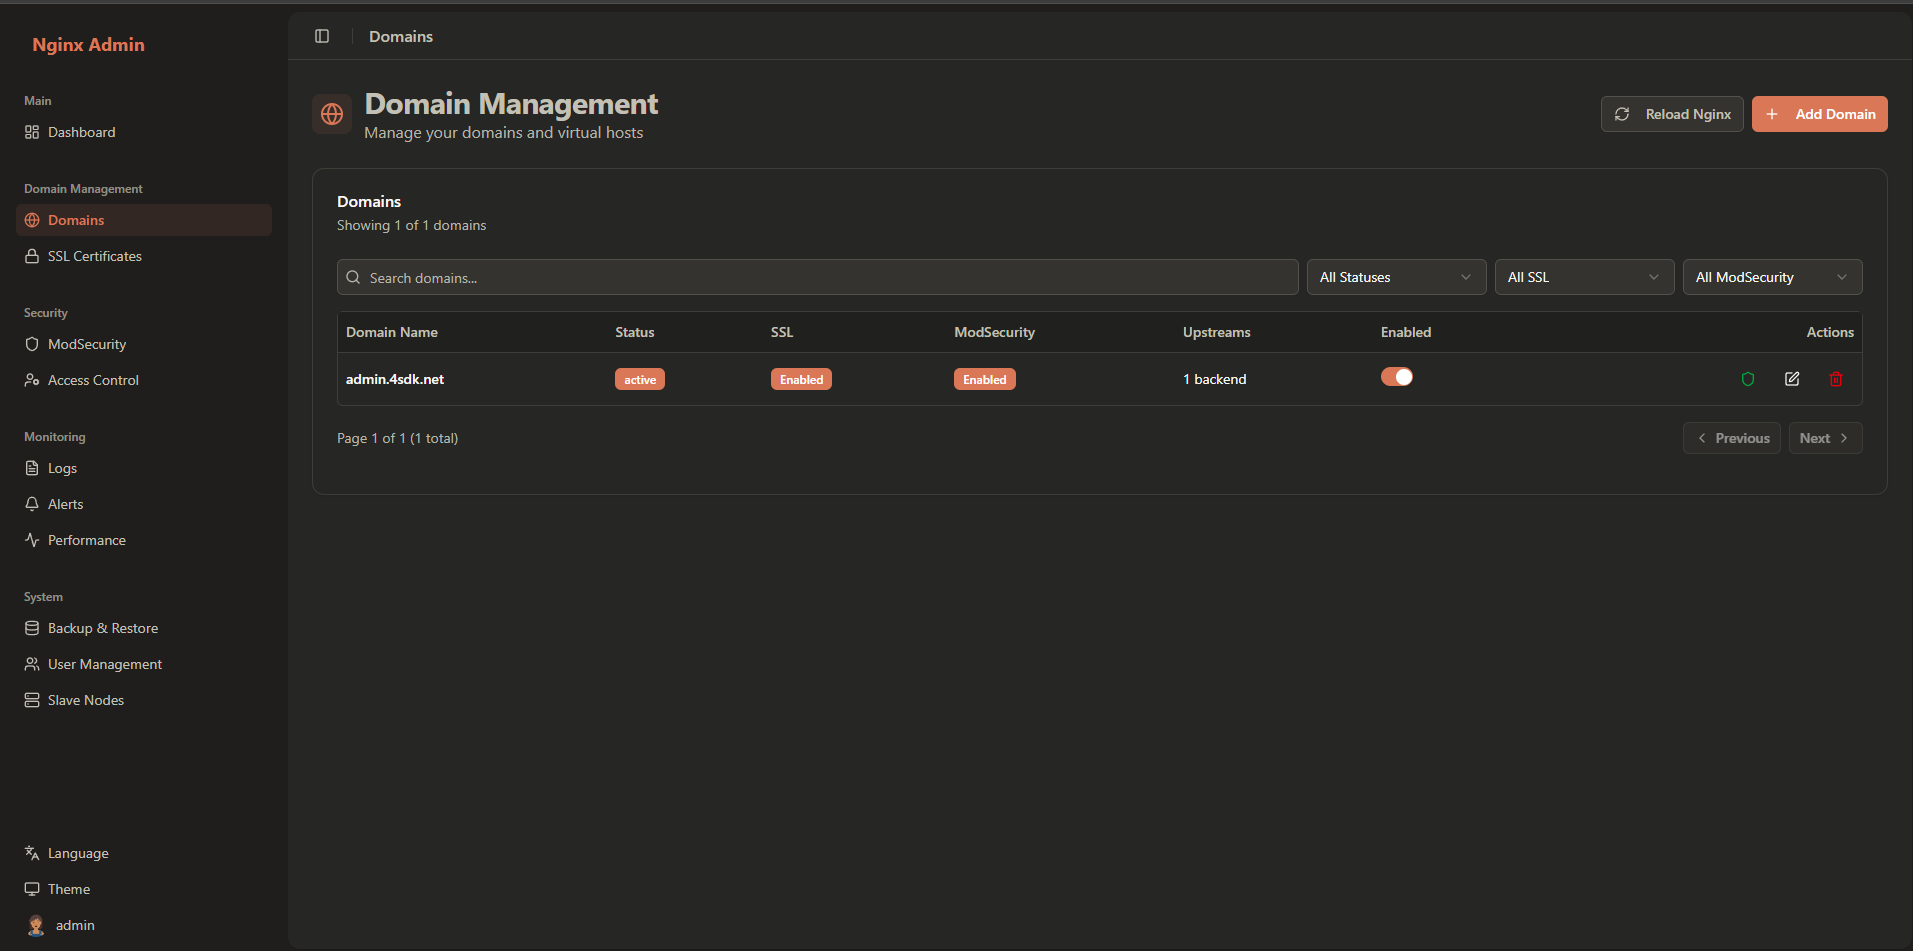
Step 3: Add Your First Domain
Navigate to Domain Management
- Click on Domains in the sidebar navigation
- You'll see the domain management interface:
Create a New Domain
- Click the Add Domain button
- Fill in the domain details:
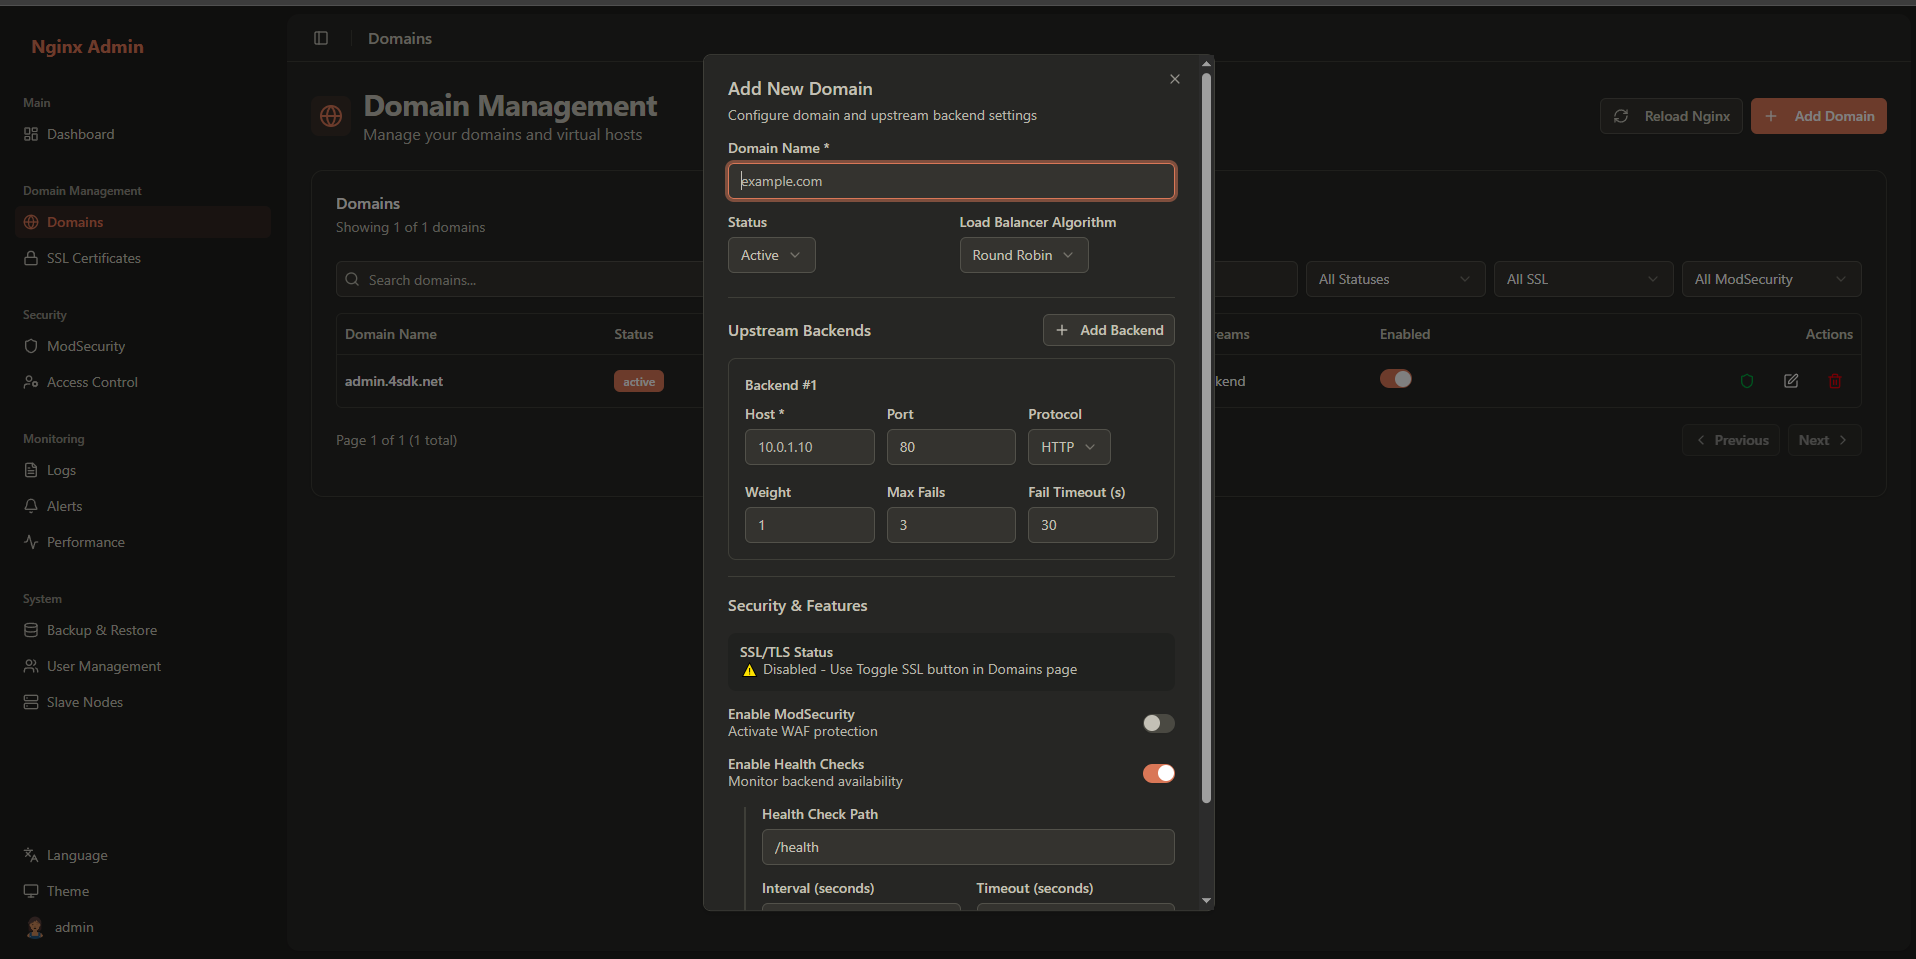
Required Fields:
- Domain Name: e.g.,
example.comorapi.example.com - Upstream Servers: At least one backend server
Upstream Configuration:
- Host: IP address or hostname of your backend server
- Port: Port number (e.g., 80, 8080, 3000)
- Protocol: HTTP or HTTPS
- Weight: Load balancing weight (default: 1)
- Max Fails: Maximum failed attempts before marking as down (default: 3)
- Fail Timeout: Timeout in seconds before retrying (default: 10)
Example Configuration:
Domain Name: api.example.com
Upstream Server 1:
  Host: 192.168.1.100
  Port: 8080
  Protocol: HTTP
  Weight: 1
  Max Fails: 3
Fail Timeout: 10- Click Save to create the domain
Verify Domain Creation
After saving, you'll see your new domain in the list with status indicators:
- Status: Active/Inactive/Error
- SSL: Enabled/Disabled
- ModSecurity: Enabled/Disabled
- Upstreams: Health status of backend servers
Step 4: Configure SSL Certificate
Enable SSL for Your Domain
- Select your domain from the list
- Click the SSL tab
- Click Enable SSL
Choose SSL Method
You have two options for SSL certificates:
Option 1: Let's Encrypt (Recommended)
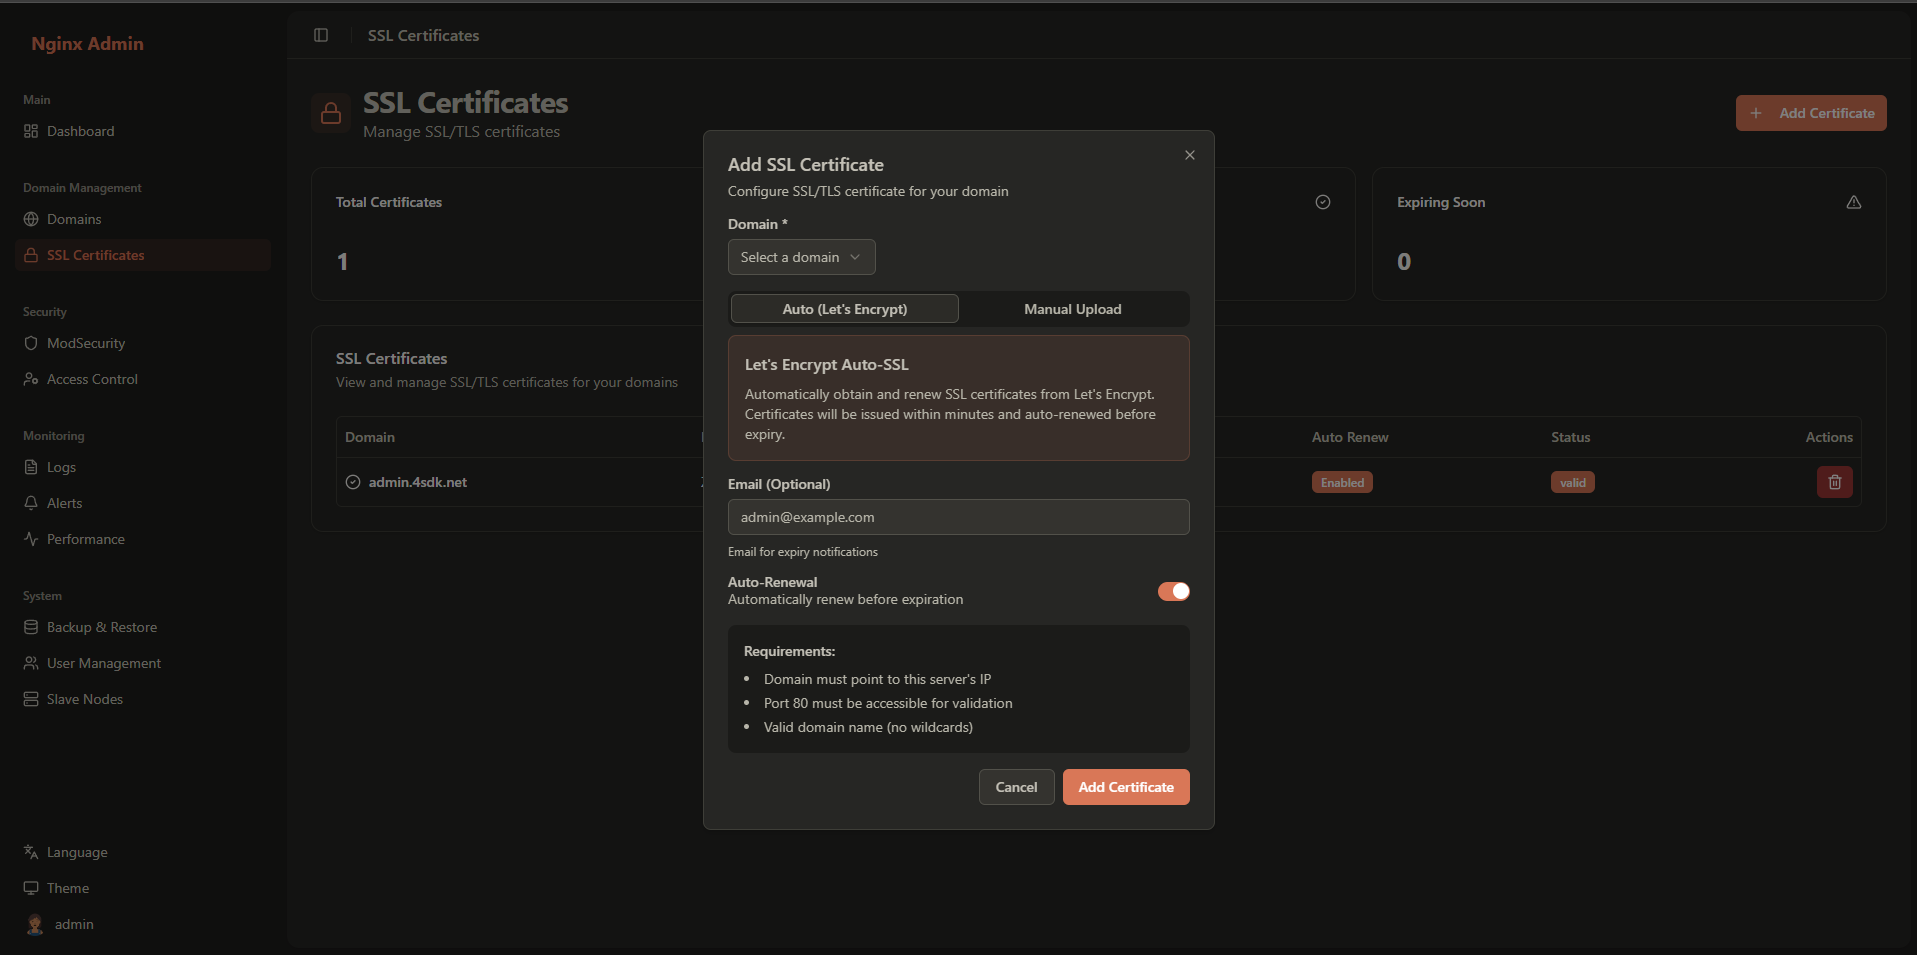
- Select Let's Encrypt as the certificate provider
- Enter your email address for certificate notifications
- Ensure your domain points to this server (DNS A record)
- Click Save and Issue Certificate
The system will:
- Validate domain ownership
- Generate a certificate
- Configure automatic renewal (default: 30 days before expiry)
Option 2: Manual Certificate Upload
- Select Manual Upload
- Upload your certificate files:
- Certificate: Your domain certificate (.crt or .pem)
- Private Key: Your private key (.key)
- Chain: Certificate chain (optional)
- Enter issuer information
- Click Save
Verify SSL Configuration
After successful configuration, you'll see:
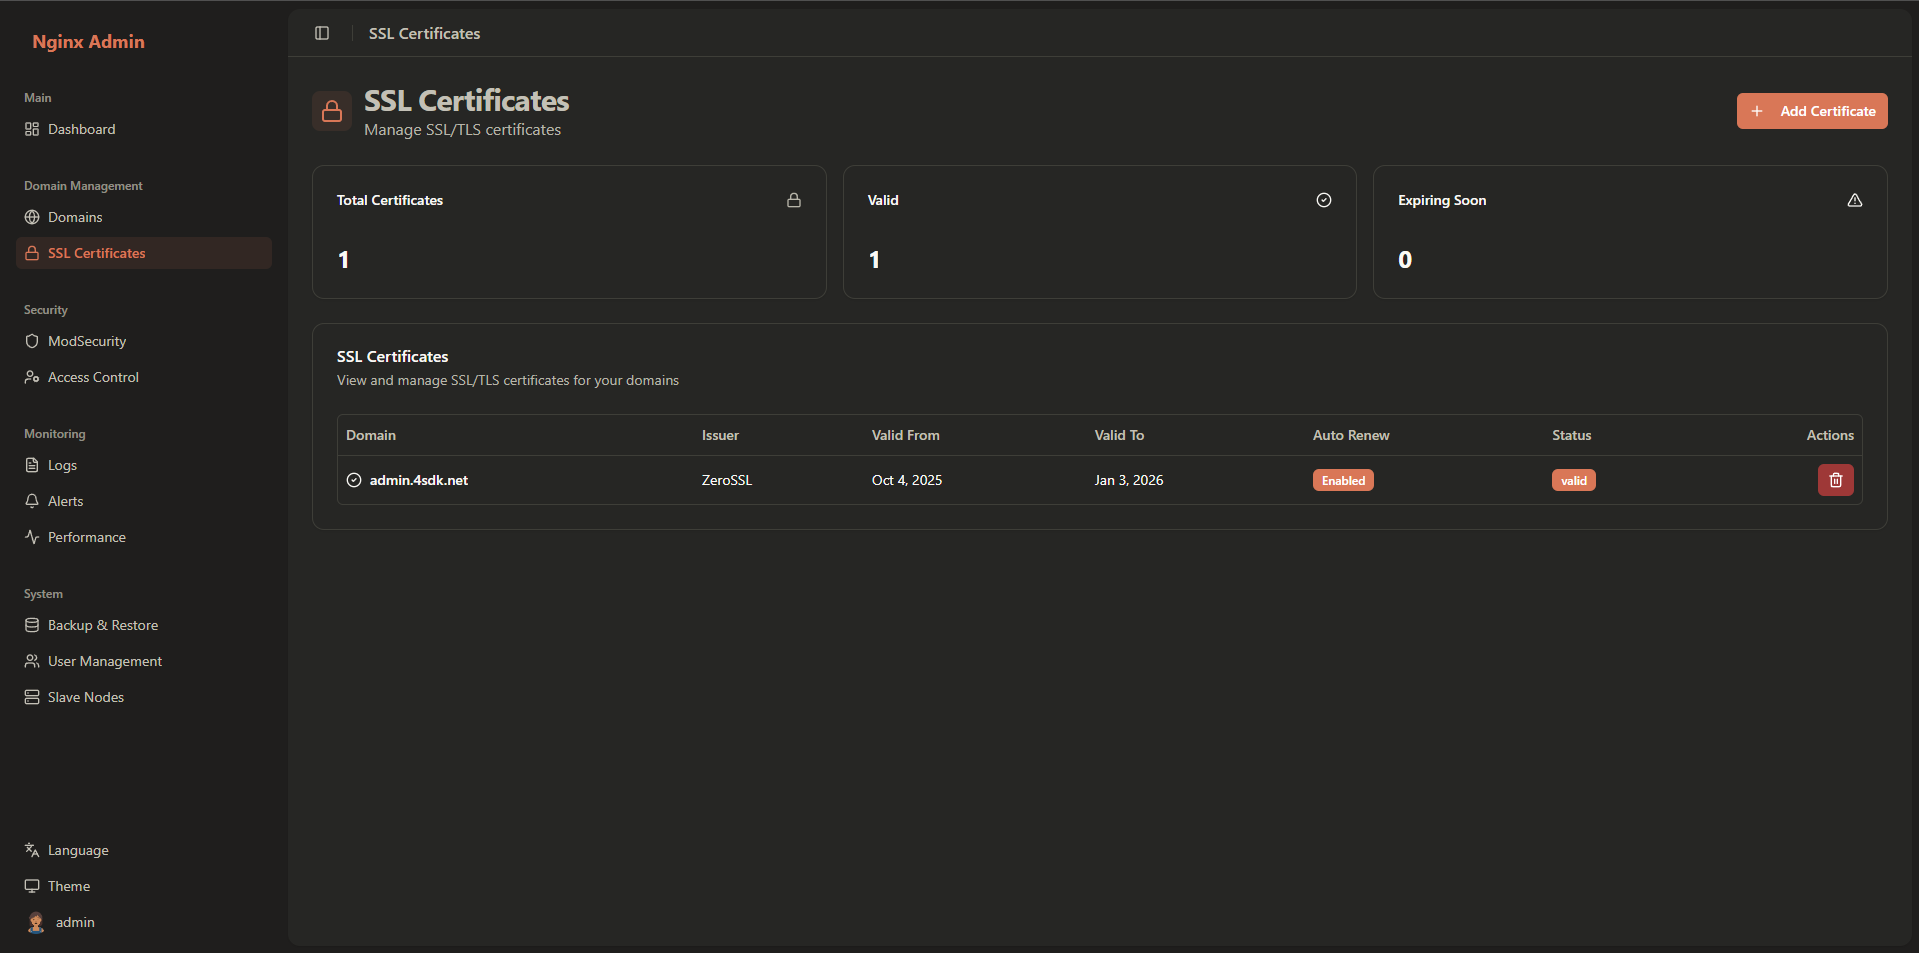
- Certificate Details: Common name, SANs, issuer, validity period
- Auto-renewal Status: Enabled/Disabled
- Certificate Status: Valid/Expiring/Expired
Step 5: Configure ModSecurity WAF
Enable ModSecurity
- Select your domain from the list
- Click the ModSecurity tab
- Toggle Enable ModSecurity
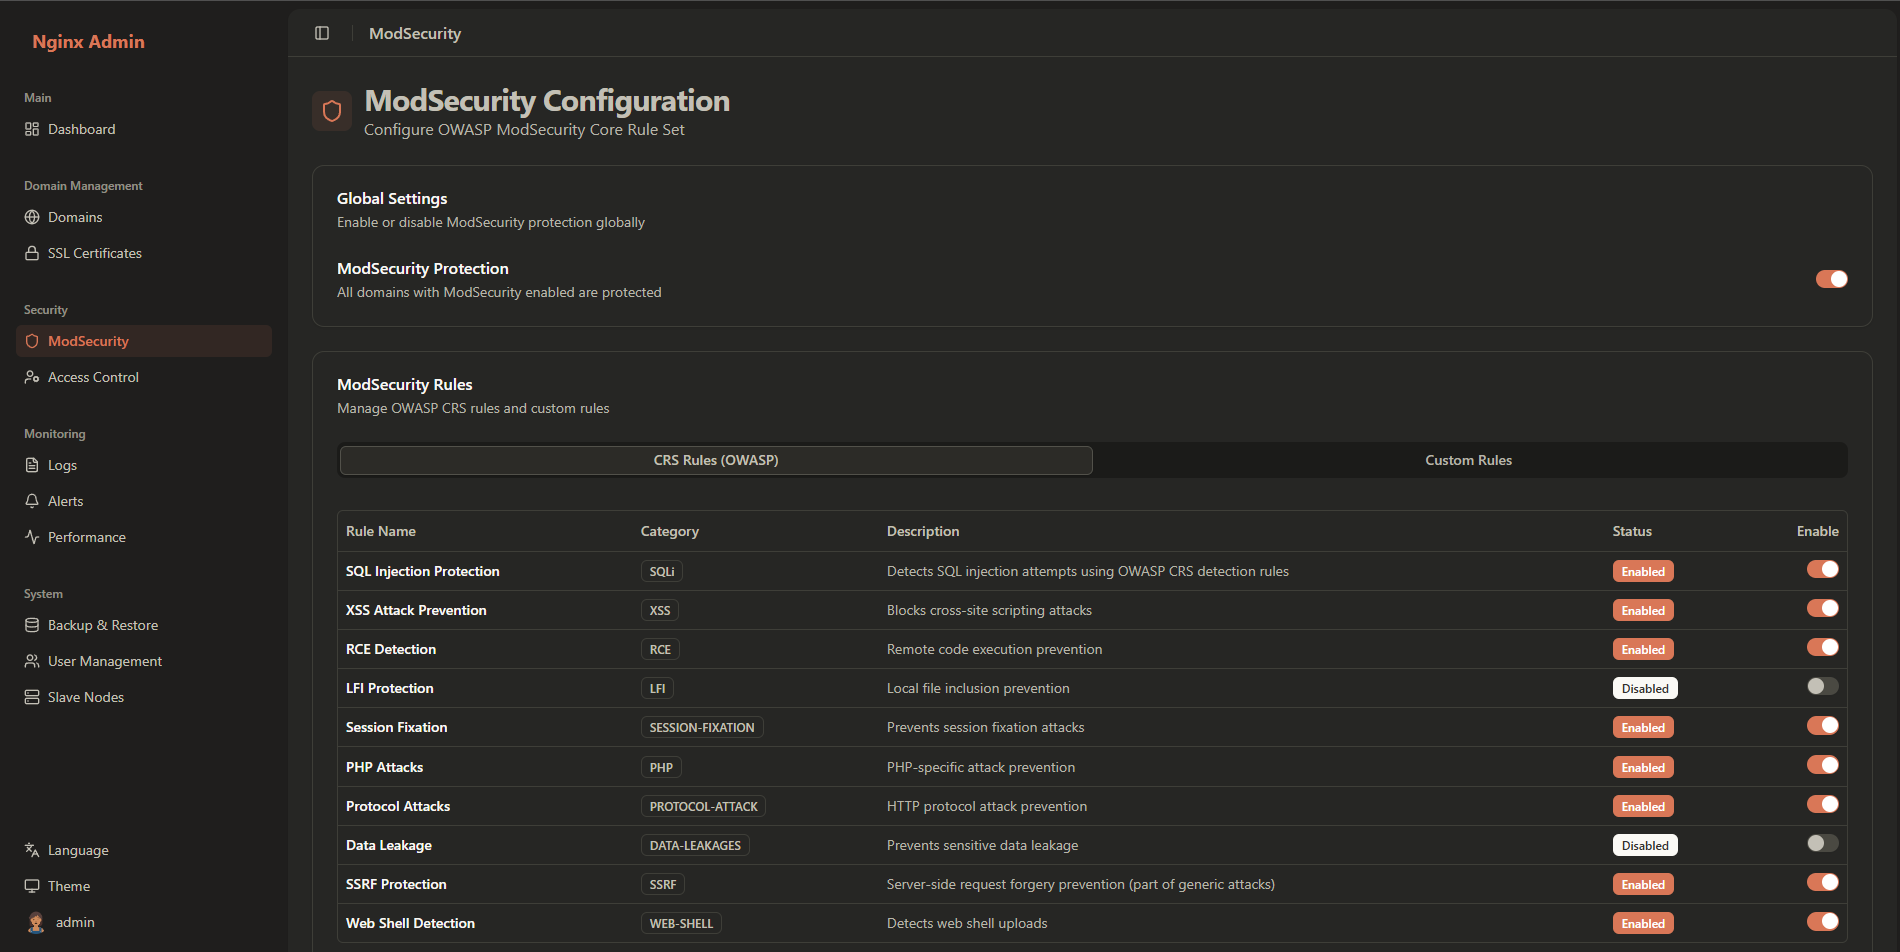
Configure OWASP CRS Rules
Rule Categories: View available rule categories
- SQL Injection Protection
- Cross-Site Scripting (XSS)
- Remote File Inclusion
- PHP Injection
- Session Fixation
Paranoia Level: Choose security level
- Level 1: Default (recommended for most applications)
- Level 2: Higher security, some false positives possible
- Level 3: Very high security, more false positives
- Level 4: Maximum security, requires extensive testing
Enable/Disable Rules: Toggle individual rules as needed
Add Custom Rules (Optional)
- Click Add Custom Rule
- Enter rule details:
- Name: Descriptive rule name
- Category: Rule category
- Rule Content: ModSecurity rule syntax
- Description: What the rule does
- Click Save
Example custom rule:
SecRule REQUEST_HEADERS:User-Agent "@rx bot|crawler|scanner" \
    "id:1001,\
    phase:1,\
    deny,\
    status:403,\
msg:'Block known bots and scanners'"Step 6: Configure Access Control Lists (ACL)
Navigate to ACL Settings
- Click ACL in the sidebar
- You'll see the ACL management interface:
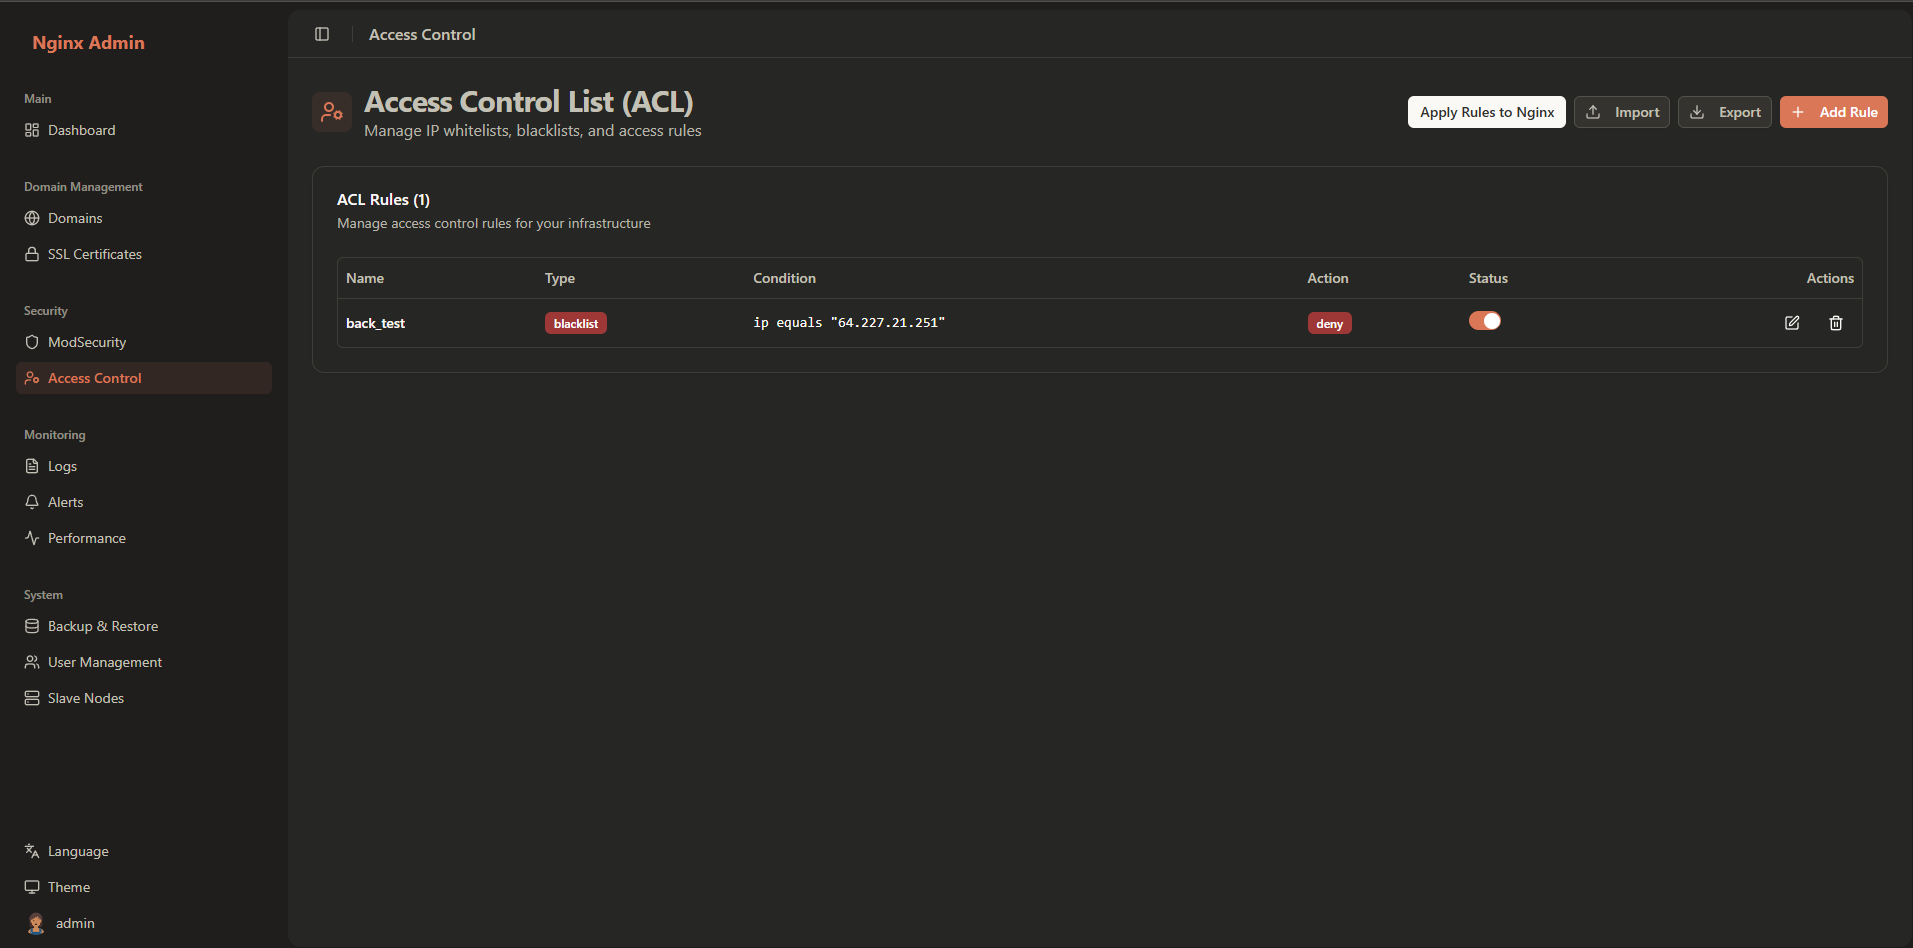
Create ACL Rules
- Click Add ACL Rule
- Configure rule parameters:
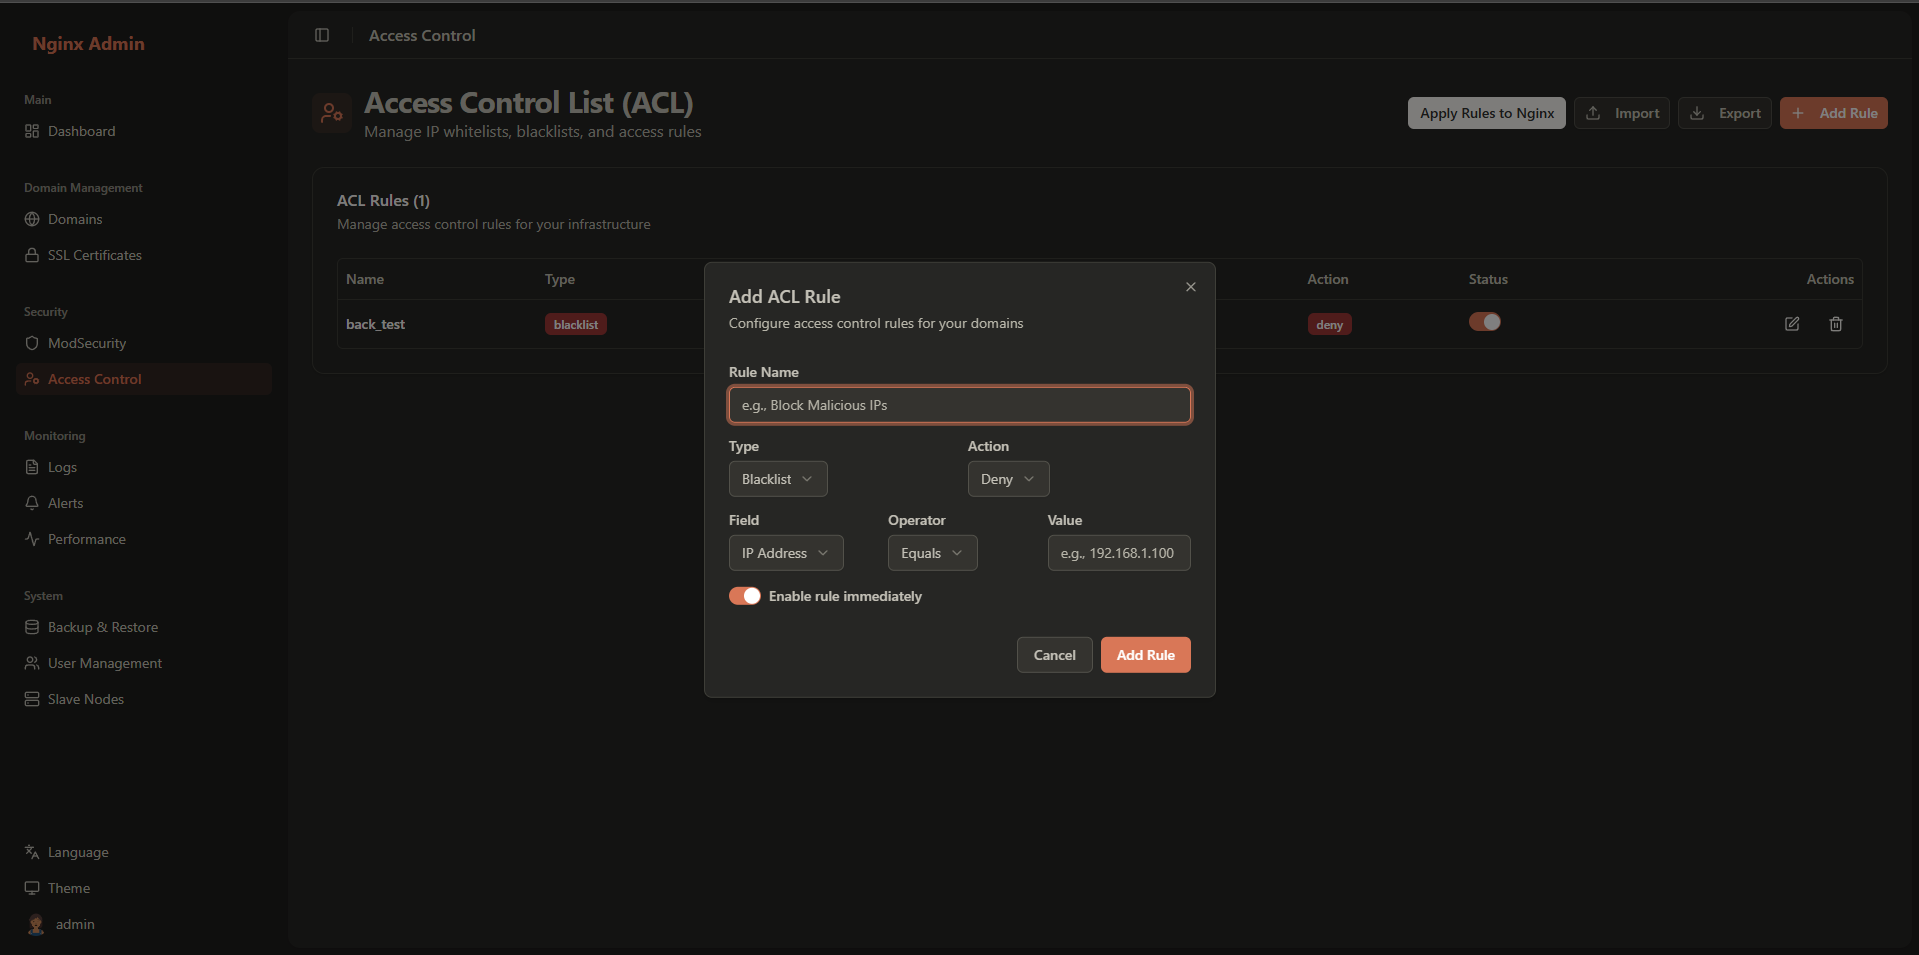
Rule Configuration:
- Name: Descriptive rule name
- Type: Whitelist or Blacklist
- Condition Field: IP, GeoIP, User-Agent, URL, Method, Header
- Operator: Equals, Contains, Regex
- Condition Value: The value to match
- Action: Allow, Deny, Challenge
Example Rules:
Block Specific IP:
Name: Block Malicious IP Type: Blacklist Field: IP Operator: Equals Value: 192.168.1.50 Action: DenyAllow Internal Network:
Name: Allow Internal Network Type: Whitelist Field: IP Operator: Regex Value: ^192\.168\.1\. Action: AllowBlock Bad Bots:
Name: Block Bad Bots
Type: Blacklist
Field: User-Agent
Operator: Contains
Value: malware
Action: Deny
Step 7: Set Up Monitoring and Alerts
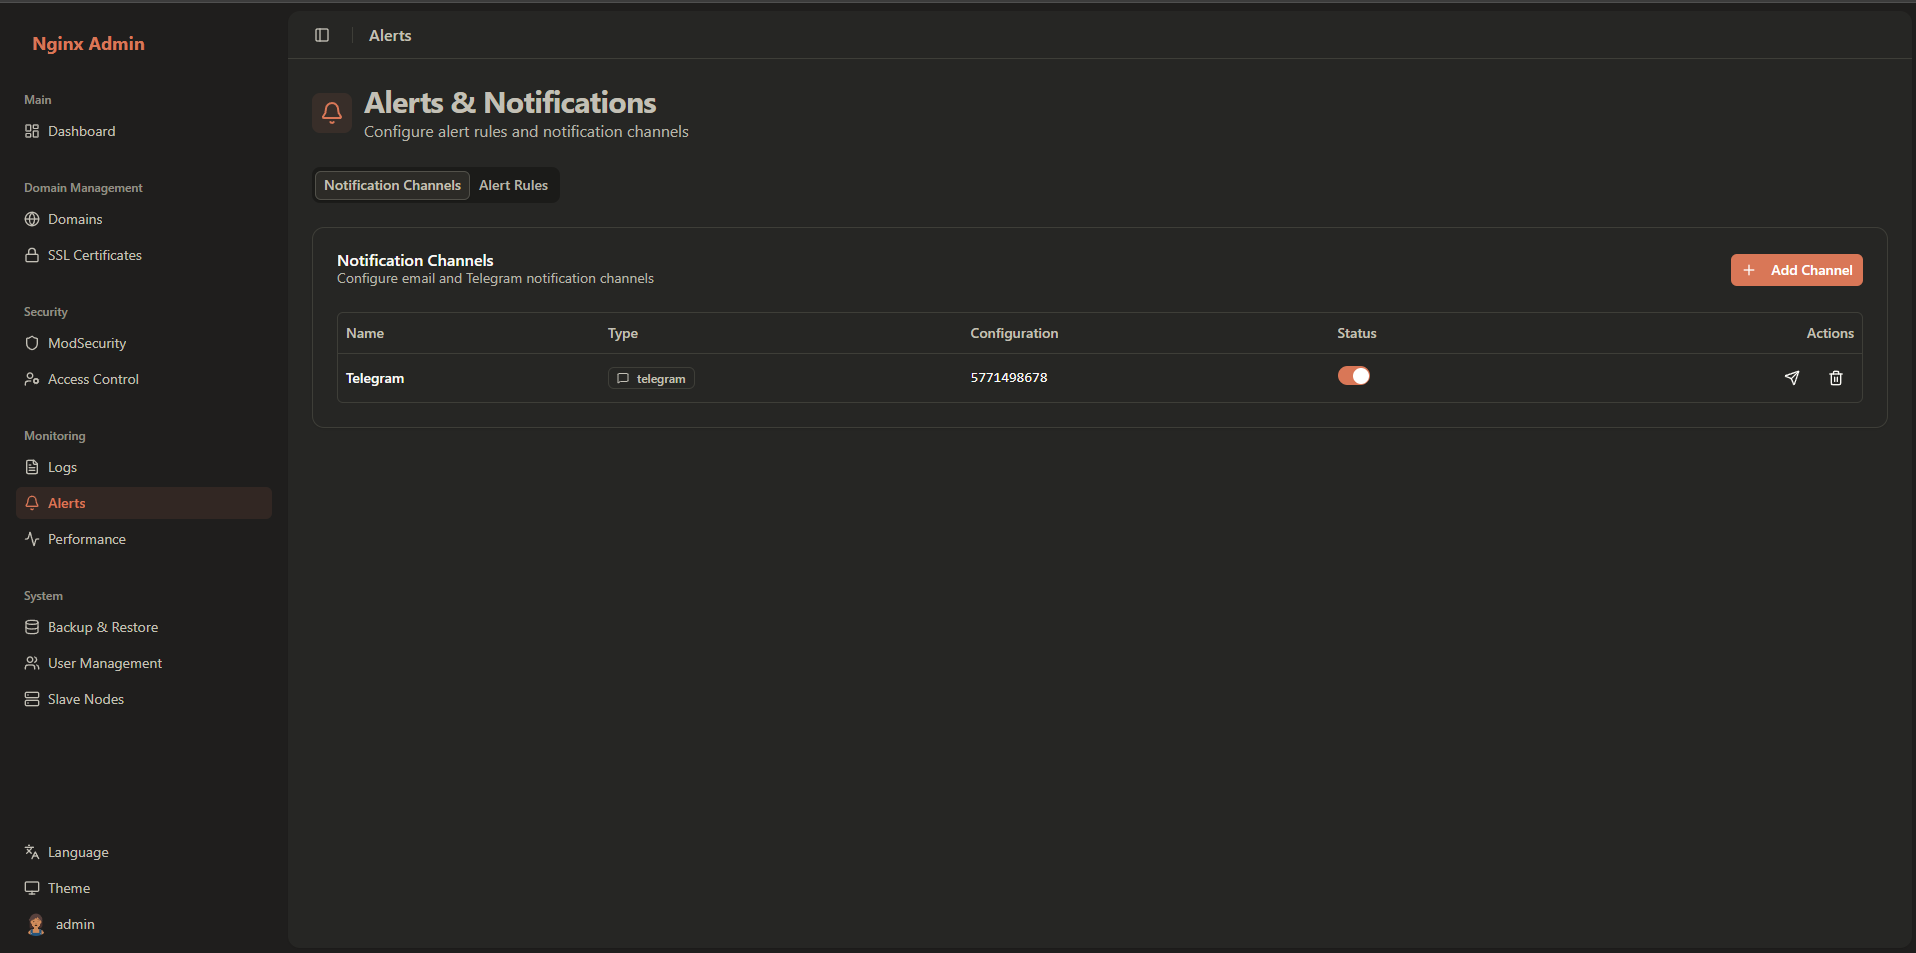
Configure Notification Channels
- Click Alerts in the sidebar
- Go to Notification Channels tab
- Click Add Channel
Email Channel Configuration:
- Name: Email Notifications
- Type: Email
- SMTP Settings: Server, port, username, password
- Recipients: Email addresses to receive alerts
Telegram Channel Configuration:
- Name: Telegram Bot
- Type: Telegram
- Bot Token: Your Telegram bot token
- Chat ID: Telegram chat ID for notifications
Create Alert Rules
- Go to Alert Rules tab
- Click Add Rule
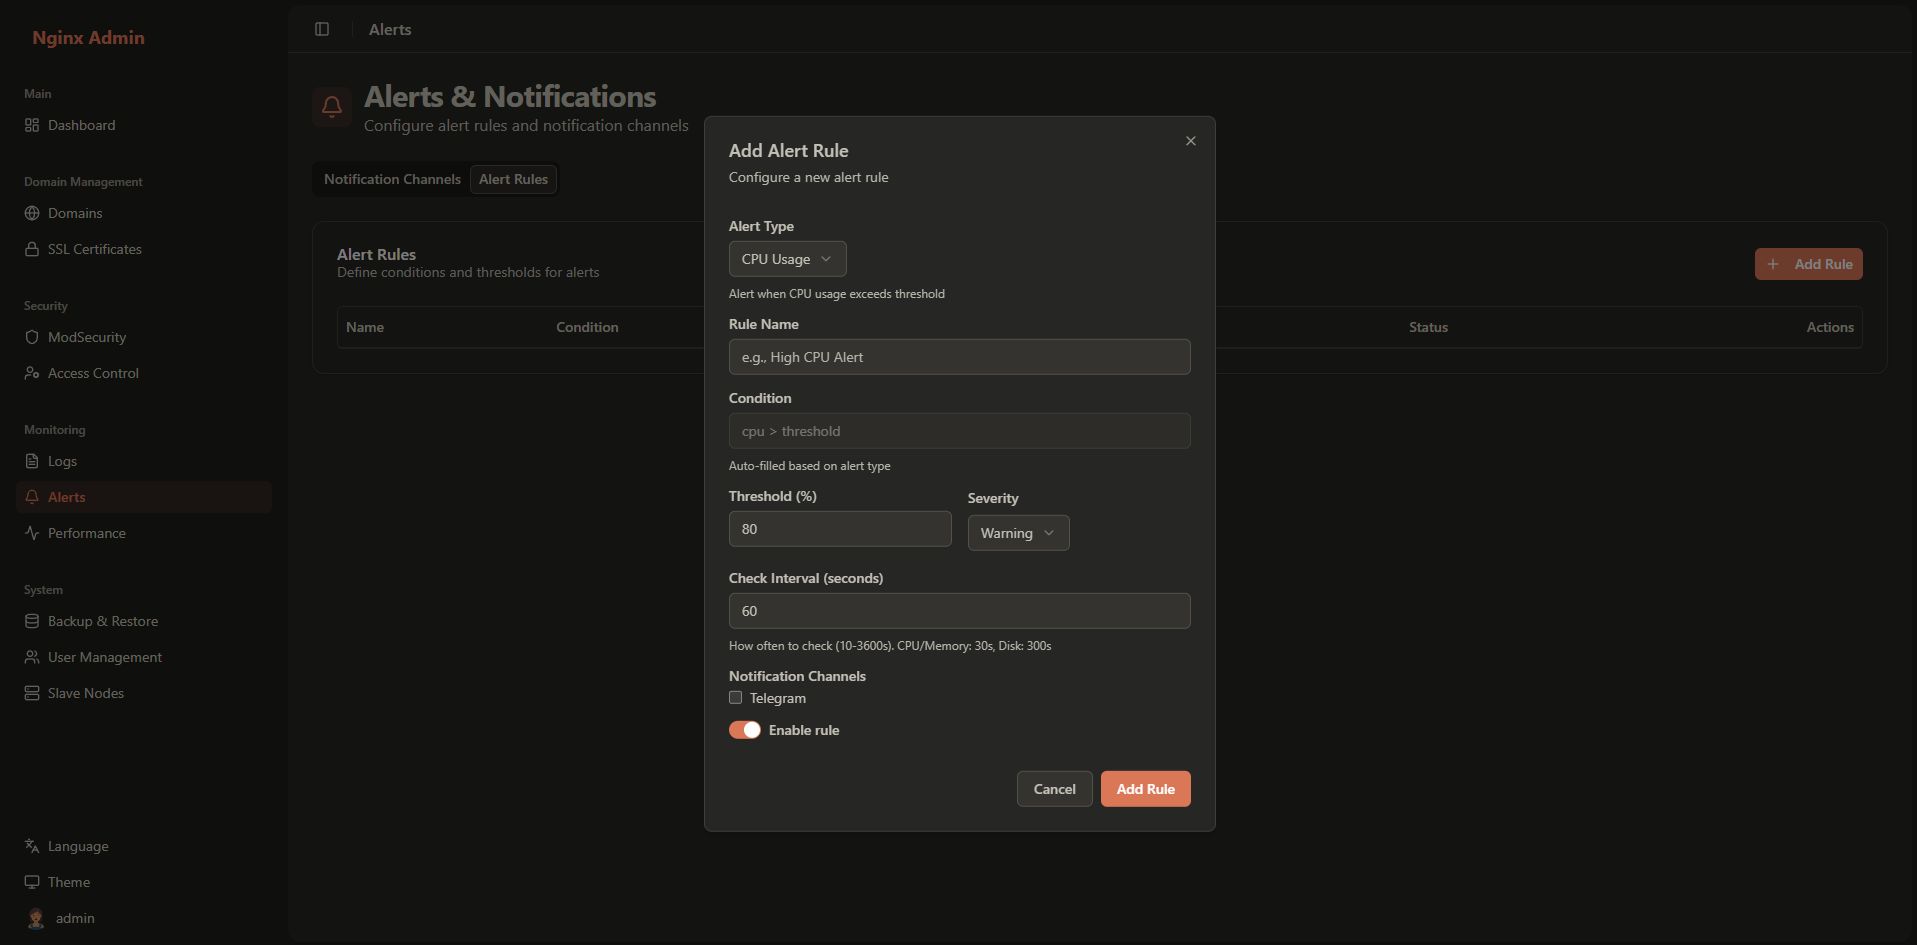
Common Alert Rules:
High CPU Usage:
Name: High CPU Usage Condition: cpu > 80 Threshold: 80 Severity: Warning Check Interval: 300 secondsBackend Server Down:
Name: Backend Server Down Condition: upstream_status == down Threshold: 1 Severity: Critical Check Interval: 60 secondsSSL Certificate Expiry:
Name: SSL Certificate Expiring
Condition: ssl_days_to_expiry < 30
Threshold: 30
Severity: Warning
Check Interval: 86400 seconds (24 hours)
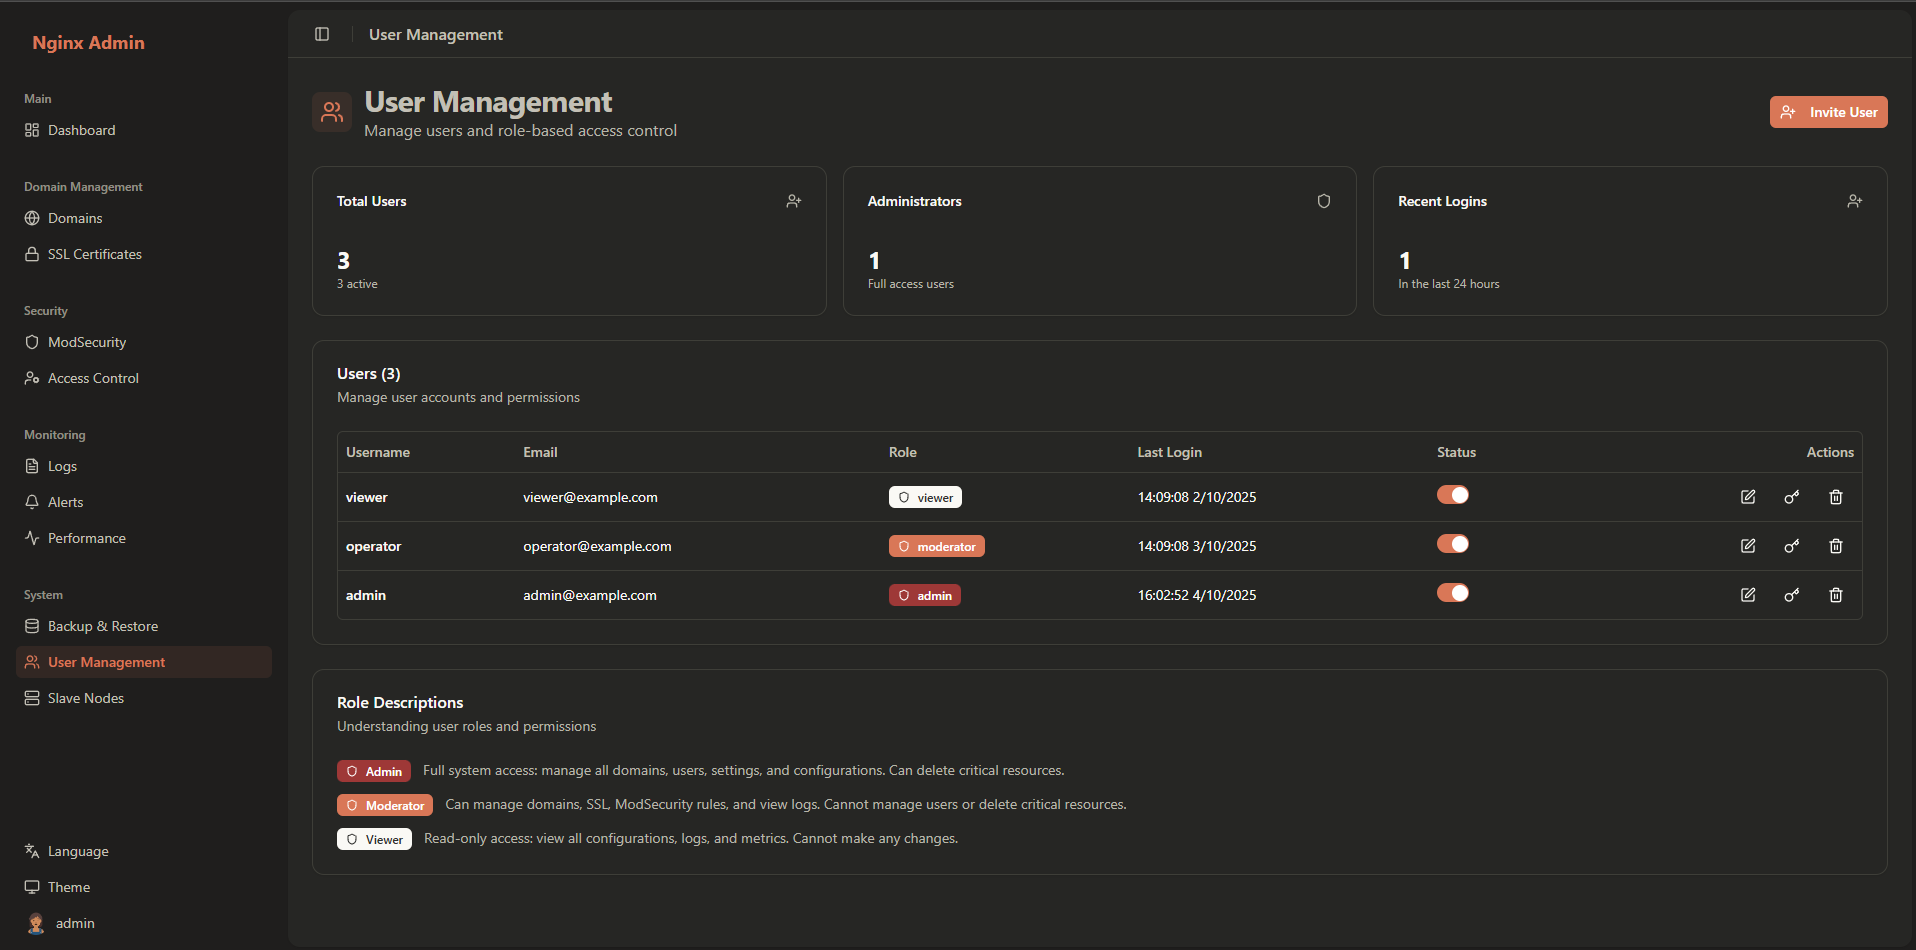
Step 8: User Management
Create Additional Users
- Click Users in the sidebar
- You'll see the user management interface:
- Click Add User
- Fill in user details:
- Username: Unique username
- Email: Email address
- Full Name: Display name
- Role: Admin, Moderator, or Viewer
- Password: Initial password
- Status: Active or Inactive
User Roles:
- Admin: Full access to all features and settings
- Moderator: Can manage domains, SSL, and security rules
- Viewer: Read-only access to dashboards and reports
Step 9: Performance Monitoring
View Performance Metrics
- Click Performance in the sidebar
- You'll see performance monitoring:

Available Metrics:
- Response Time: Average response time over time
- Throughput: Requests per second
- Error Rate: Percentage of failed requests
- Bandwidth: Network usage statistics
Analyze Domain Performance
- Select a specific domain from the dropdown
- View detailed metrics for that domain
- Identify performance bottlenecks
- Monitor trends over time
Step 10: Log Analysis
View System Logs
- Click Logs in the sidebar
- Filter logs by:
- Type: Access, Error, ModSecurity, System
- Domain: Specific domain
- Time Range: Custom date range
- Severity: Error, Warning, Info
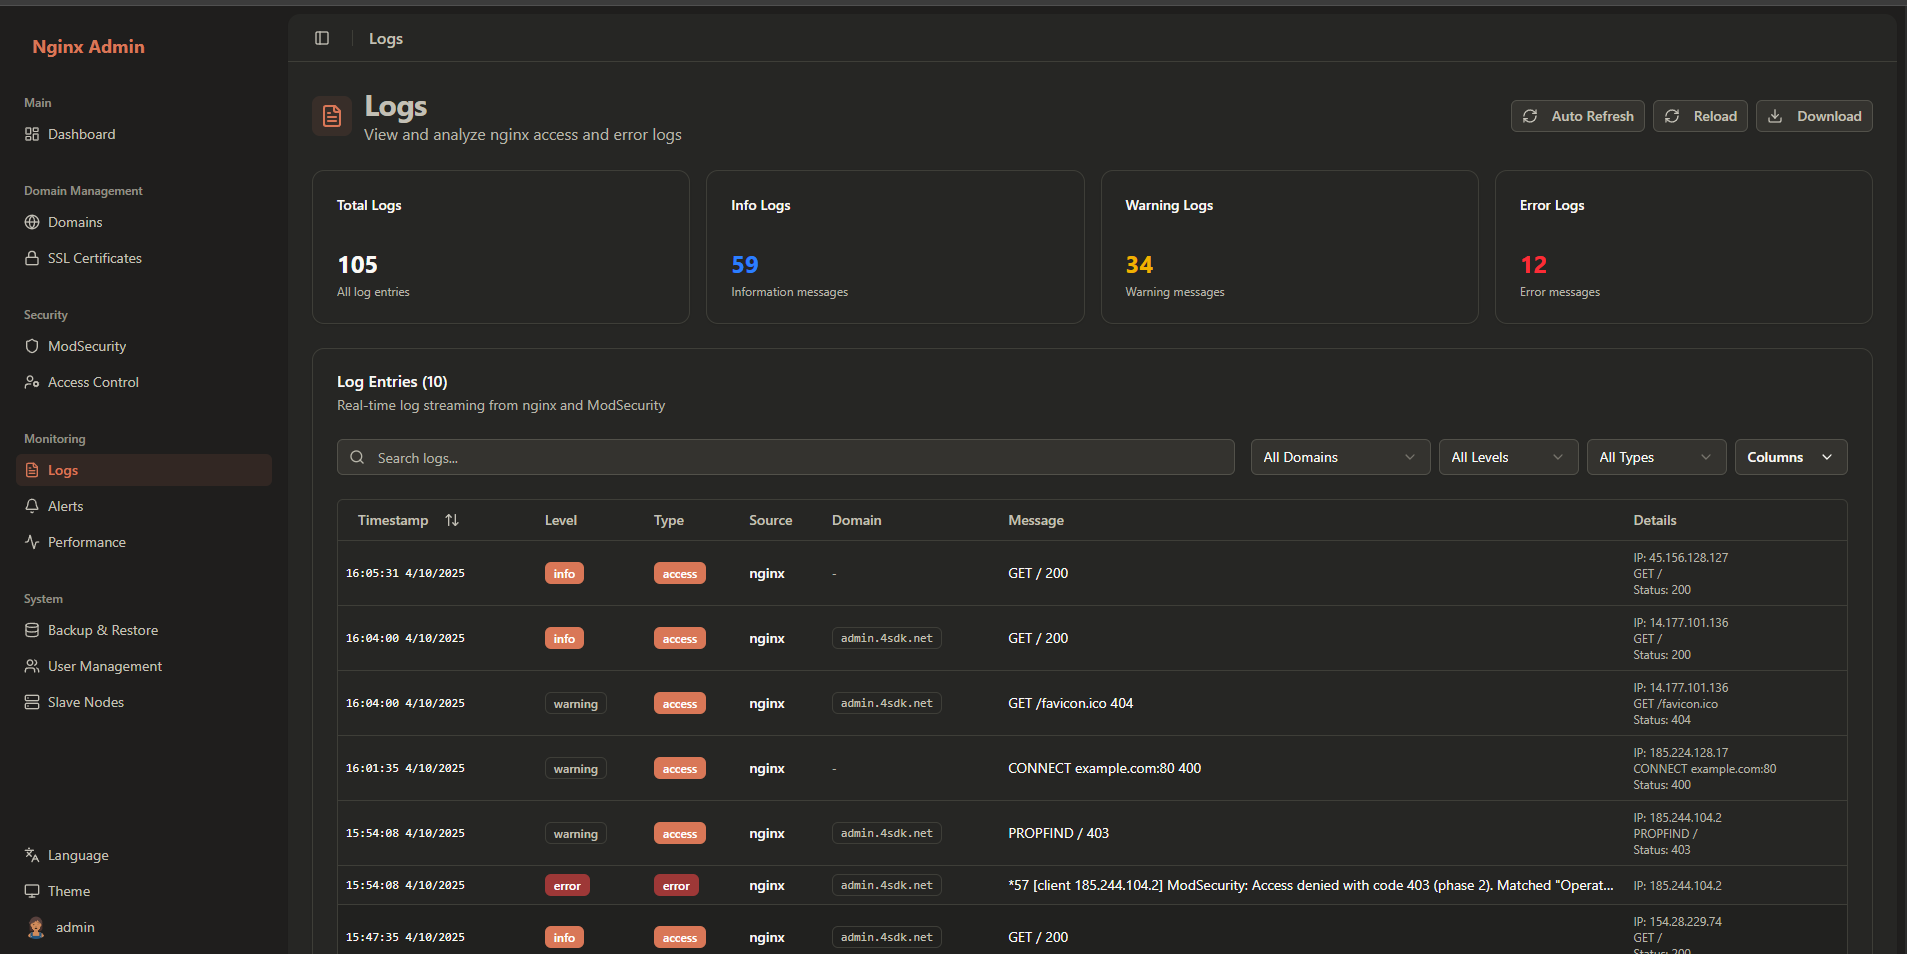
Search and Filter Logs
- Use the search bar to find specific log entries
- Apply filters to narrow down results
- Export logs for further analysis
- Monitor security events in real-time
What's Next?
Congratulations! You've successfully set up your first domain with the Nginx WAF Management Platform. Here are some recommended next steps:
Additional Configuration
- Set Up Backup: Configure regular backups of your configuration
- Fine-tune Security: Adjust ModSecurity rules based on your application needs
- Optimize Performance: Monitor and optimize load balancing settings
- Configure Additional Domains: Add more domains to manage
Advanced Features
- SSL Certificate Management: Learn about advanced SSL configurations
- ModSecurity Rules: Create custom WAF rules
- Performance Optimization: Advanced monitoring and optimization
- Log Analysis: Deep dive into log analysis and troubleshooting
- API Integration: Integrate with external systems via REST API
Maintenance and Monitoring
- Regularly check system health and performance
- Monitor SSL certificate expiry dates
- Review security logs for potential threats
- Keep the system updated with latest security patches
Need Help?
If you encounter any issues or have questions:
- Check our troubleshooting guide
- Review the FAQ
- Browse our API documentation
- Contact support for assistance
Installation Complete
The installation wizard will show a completion screen when all components are successfully installed:
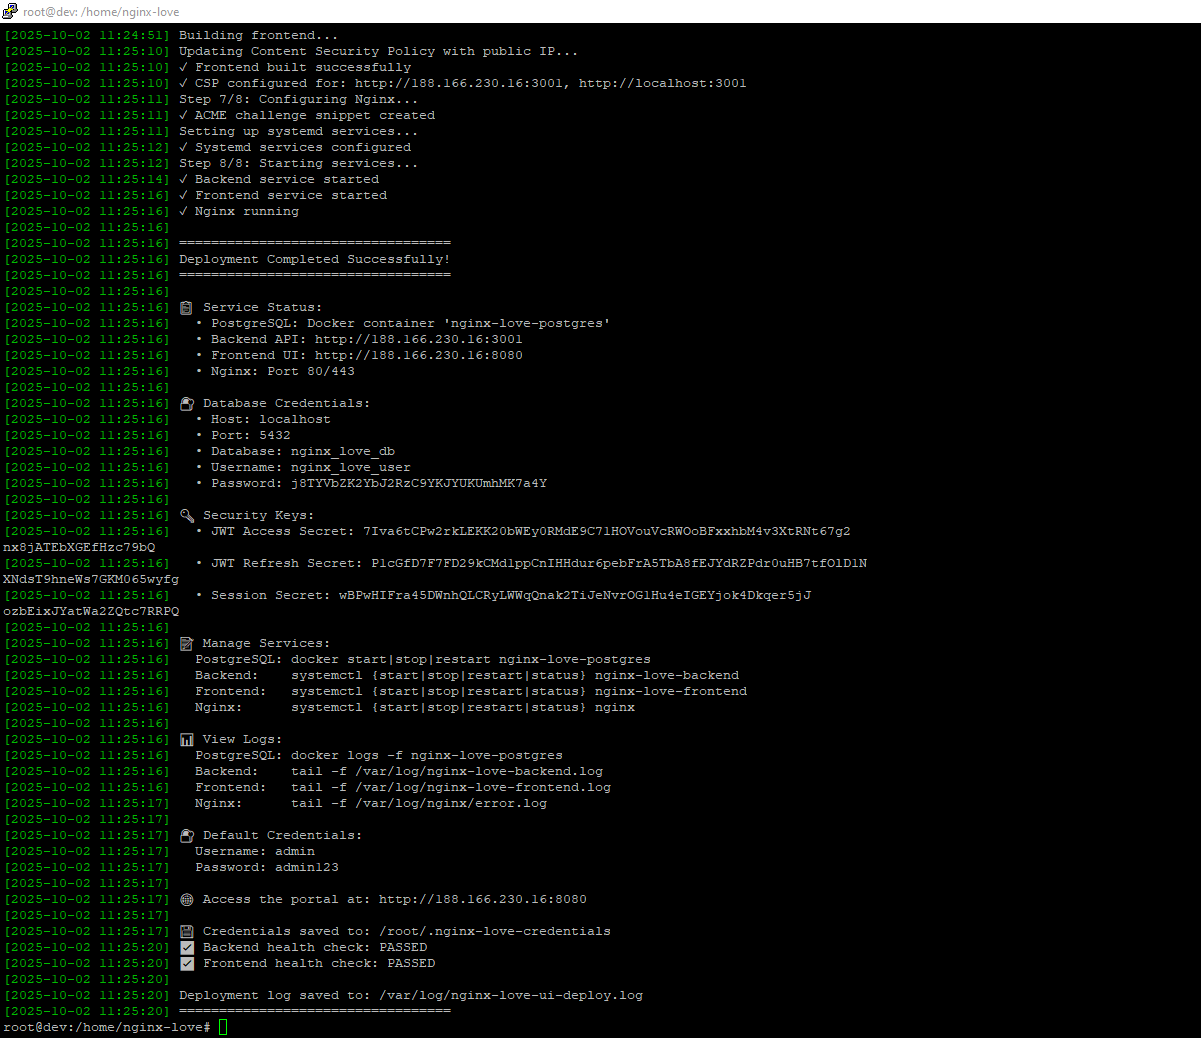
Your Nginx WAF platform is now ready for production use!